 I had sometime back, seen a Pilot Maki art pen in some airport showroom that was really very much oversized. Kept wondering for days as to what size of a hand would be needed to use that large pen. Anyway, I had been contemplating for days to make one similar sized pen and last couple of days that idea seized me.
Now at home I do not have a lathe, so kept thinking how to make one. Well I had a few part finished kit-less pens lying with me and searching for the largest kit, I found a Shotgun kit. Let us try.

This was the kit-less part finished one that I chose- it was made with a thick brass tube cap and aluminum tube barrel, the external part of the barrel tube were threaded for the cap, both ends. To use this with the kit required me to cut off the barrel extensions and using a hand reamer to bring the aluminum tube to correct size for fitting the couplers from the kit. The process took me half a day and sore hands but at the end the barrel tube came off at the glue leaving the wooden sleeve. That was good in a way, I could use the brass tube from the kit and with no further re-sizing could fit the couplers. To the pen body is ready.
For the cap : this brass tubed cap already had a brass collar, adding the cap part ferrule would give a excessively long cap band. What to do- but I kept it because I wanted a long pen. I managed to find a die-grinder at home and the size moderation in side the tube to fit the kit part was not much difficult.
So in effect the pen was ready, only needed a little more polish.
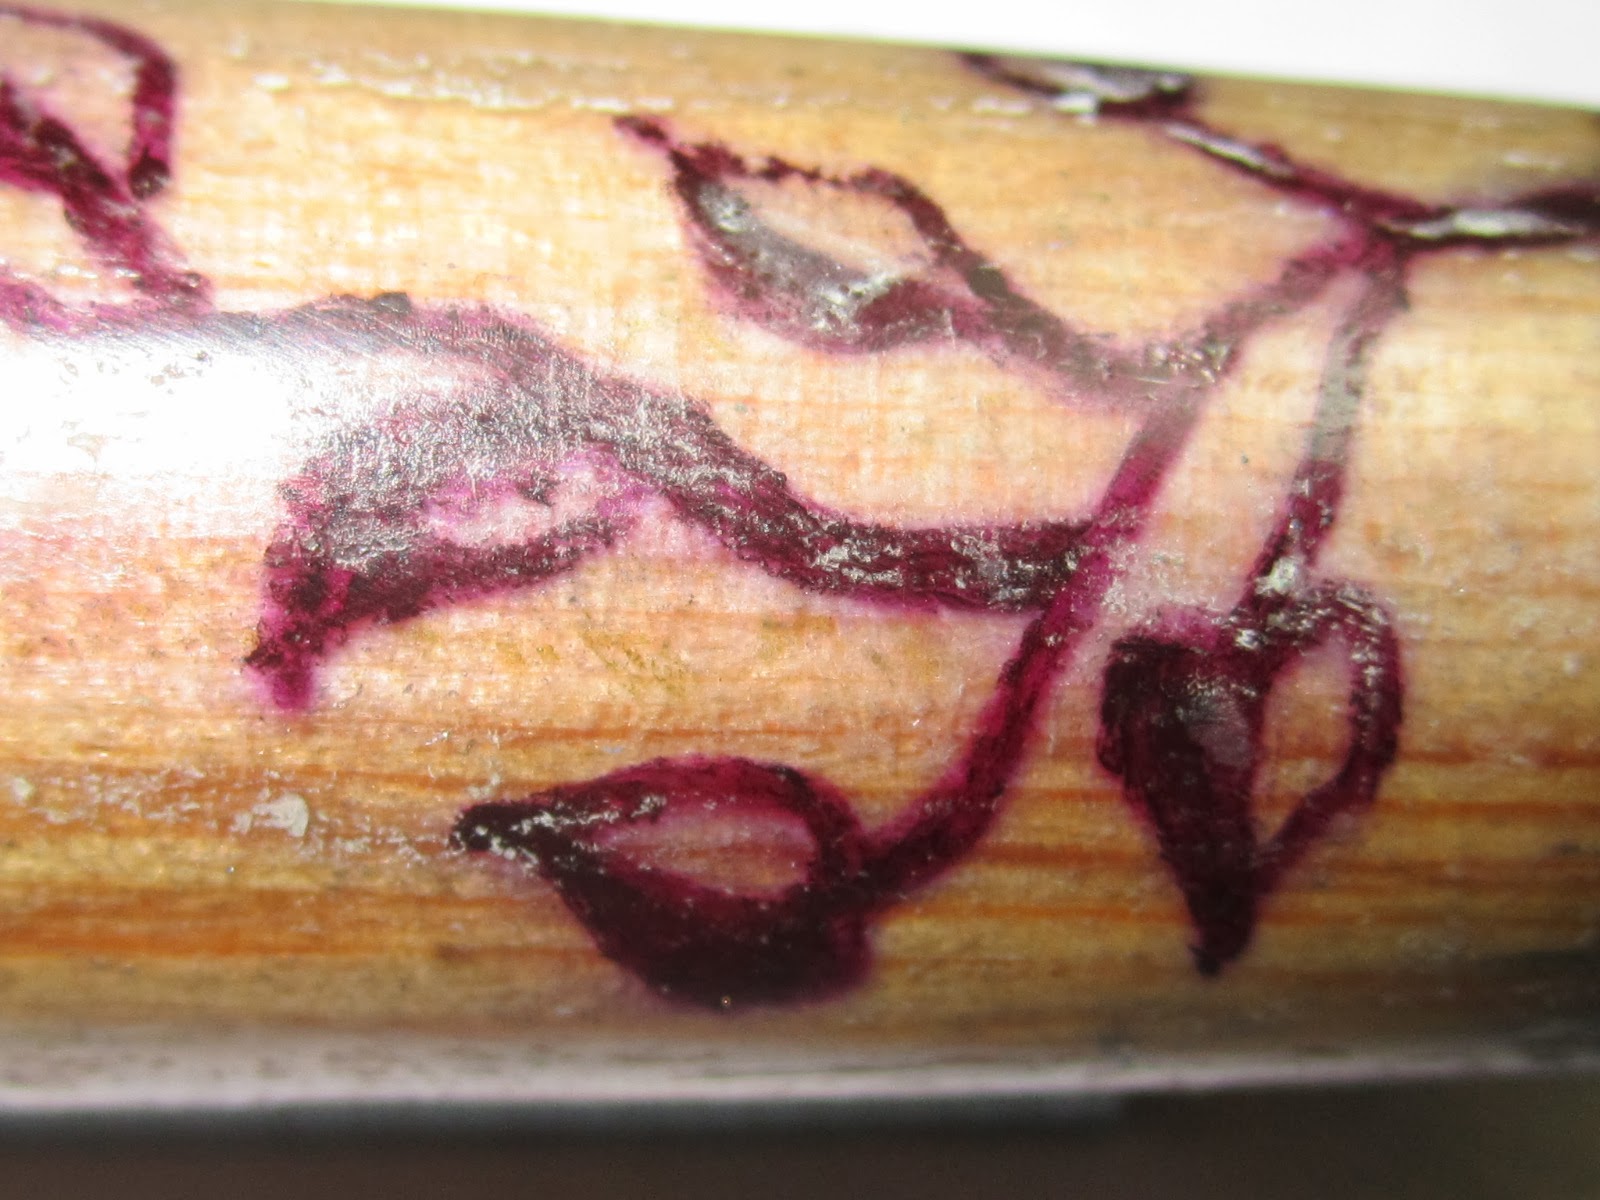
Now I wanted to try one more technique , that is , a simple inlay design. My daughter helped, she is good at drawing. A simple vine branch with a few leaves. This pattern was drawn with a pencil first and made 0.5 mm deep grooving using curving knives. The grooves were filled up using a microtip permanent marker- chosen black colour , in retrospect green would have been more lively.
Now comes the hard part. These grooves with the permanent ink fill and the body in general were coated with CA. Five successive layers were given with drying and rough sanding in between and finally a full sequence eight grade hand polish by micromesh stick. Did three sets of this treatment to finish. Lots of time and struggle as I did not use a lathe!
The finished pen looked somewhat close to what I imagined. But the wood part brightness became darkened due to a minor part of the ink dissolving in the CA and a small amount of brass getting mixed.

Compared with a standard sized shotgun pen: This pen is 18 cm long , capped!


I
Inspected closely by a lense, there are very small pores on
the surface. This is on the top CA layer. Later I would give more coats of CA and mix a lemon yellow dye to
the CA to eliminate the blackish hue.

Generally happy with what I started out to do, here is this
oversized Shotgun pen.
Definitely not a practical writer, perhaps none in this
size are. But does look good as a showpiece.
Welcome comments and critiques.
No comments:
Post a Comment